Advertisement
Canon Pixma TS5110 Driver Download for Windows 11-10-8.1-7 (32bit/64bit)
TS5100 series Full Driver & Software Package-TS5100 series MP Drivers (Windows)
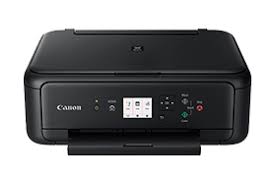
The Canon PIXMA TS5110 Wireless Inkjet All-in-One home printer is an excellent all-round printer designed to meet all your daily printing needs. Connect the way you want with features you expect, like AirPrint, Google Cloud Print, and Wi-Fi. You can make copies with the built-in scanner and scan important documents directly to your smartphone using the Canon PRINT app. You can easily print documents and photos at home.
Canon Pixma TS5110 Full Driver for Windows
This file will download and install the drivers, application or manual you need to set up the full functionality of your product.
Version: 1.3
File Name: win-ts5100-1_3-n_mcd.exe
Relese Date: 12/09/2022
Size: 20.8 MB
Operating systems: Windows 11, Windows 10 (32bit), Windows 10 (64bit), Windows 8.1(32bit), Windows 8.1(64bit), Windows 7 SP1 or later(32bit), Windows 7 SP1 or later(64bit)
Download / Installation Procedures
*Be sure to connect your PC to the Internet while performing the following: 1. Download the file. For the location where the file is saved, check the computer settings. 2. Double-click the downloaded .exe file. It will be decompressed and the Setup screen will be displayed. Follow the instructions to install the software and perform the necessary settings.
Canon Pixma TS5110 MP Driver for Windows
This driver will provide full printing and scanning functionality for your product.
Version: 1.01
File Name: mpnp-win-ts5100-1_01-ea34_2.exe
Post Date: 10/04/2021
Size: 89.57 MB
Compatible systems: Windows 11-Windows 10-Windows 10 (x64)-Windows 8.1-Windows 8.1 (x64)-Windows 7-Windows 7 (x64)
Download / Installation Procedures
1. Download the file. For the location where the file is saved, check the computer settings.
2. Double-click the downloaded EXE file to decompress it, then installation will start automatically.
Uninstall Procedures If needed, you can uninstall this program using the Control Panel.
*The steps below are for Windows 7. This procedure may be different for other OSes.
1. On the Start menu, click Control Panel, and then, under Programs click Uninstall a Program
2. A page will open with a list of installed programs. Double click on the program that you want to uninstall.
3. Click “Yes” then “OK”, this will complete the uninstallation process.
