Advertisement
Canon Pixma MG2570S Printer Driver Download for Windows 11-10-8.1-8-7-Vista (32bit-64bit)
MG2500 series Full Driver & Software Package and MP Driver (Windows)
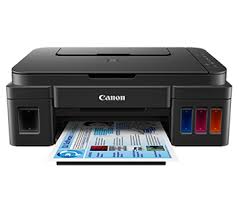
Canon Pixma MG2570S InkJet Printer
Description:
This is an online installation software to help you to perform initial setup of your canon printer on a PC (either USB connection or network connection) & to install various software.
Canon PIXMA MG2570S Full Driver & Software Package for Windows
Version: 1.2
Released: 18 December 2024
Size: 47.3 MB
DOWNLOAD
Compatibility Systems: Windows 11, Windows 10 (32bit), 10 (64bit), Windows 8.1 (32bit), 8.1 (64bit), Windows 8 (32bit), 8 (64bit), Windows 7 (32bit), 7 (64bit), Vista (32bit), Vista (64bit)
Download / Installation Procedures
- Click the link, select [ Save ], specify “Save As”, then click [ Save ] to download the file.
Memo :
If you select [ Run ] ( or [ Open ] ) instead of [ Save ], the file will be automatically installed after it is saved. - The downloaded file will be saved in the specified place in the self-extracting form ( .exe format ).
- Double-click the downloaded EXE file to decompress it, then installation will start automatically.
Canon PIXMA MG2570S MP Driver for Windows
Version: 1.0
Release Date: 9 October 2024
Size: 22.6MB
Operating Systems: Windows 11 – 10-10×64 – 8.1-8.1×64- 8-8×64 – 7-7×64
Download / Installation Procedures
- Click the link, select [ Save ], specify “Save As”, then click [ Save ] to download the file.
Memo :
If you select [ Run ] ( or [ Open ] ) instead of [ Save ], the file will be automatically installed after it is saved. - The downloaded file will be saved in the specified place in the self-extracting form ( .exe format ).
- Double-click the downloaded EXE file to decompress it, then installation will start automatically.
Uninstall Procedures
If needed, you can uninstall this program using the Control Panel.
Note :
The steps below are for Windows 7. This procedure may be different for other OSes.
- On the Start menu, click Control Panel, and then, under Programs click Uninstall a Program
- A page will open with a list of installed programs. Double click on the program that you want to uninstall.
- Click “Yes” then “OK”, this will complete the uninstallation process.
Advertisement